
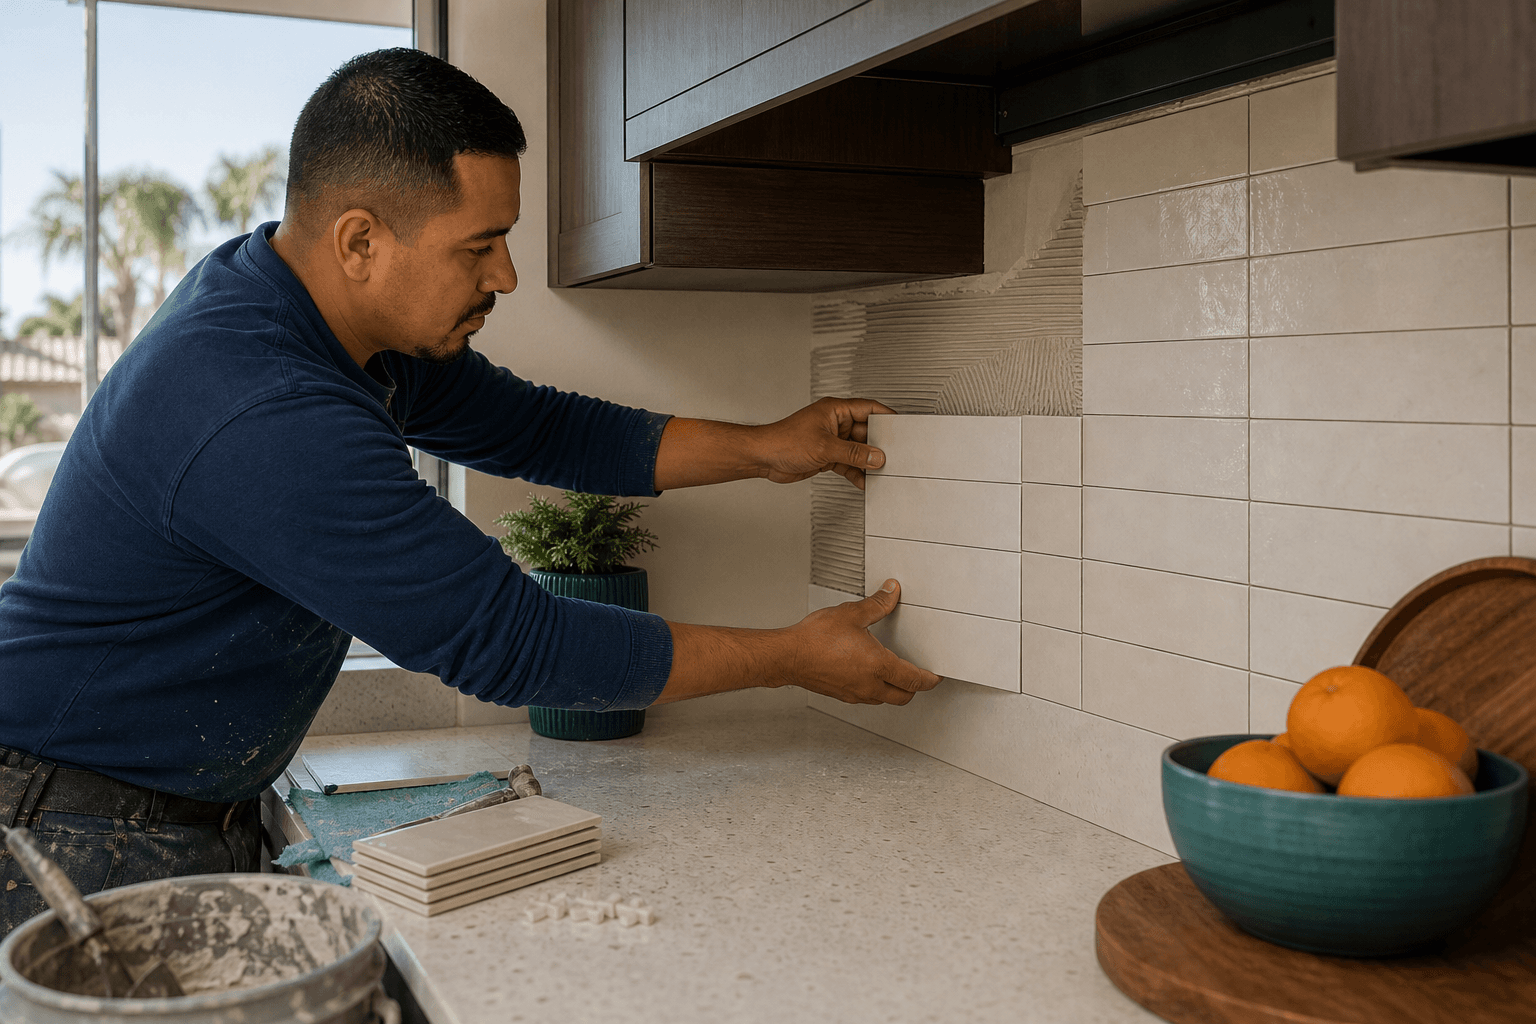
A successful kitchen backsplash installation starts with the wall, not the tile. Choose the material and adhesive system for the substrate, moisture exposure, permanence, and finish you want. Then measure the area, dry-lay the pattern, resolve outlets and edges, and plan curing before grouting.
Where to Start: Define the Backsplash Scope Before Buying Tile
Decide whether you are refreshing the backsplash alone or changing the kitchen around it. A backsplash-only project may include removing an existing finish, repairing the wall, setting tile, grouting, sealing, and caulking. A broader remodel may also affect cabinets, countertops, appliances, lighting, outlets, plumbing, flooring, or the wall layout. Related reading: Accessible Kitchen Design for Safer, Easier Cooking.
Photograph and measure each wall. Record its width and height, countertop and cabinet edges, corners, windows, outlets, switches, plumbing fixtures, appliance clearances, existing tile, painted drywall, cracks, bulges, soft spots, moisture stains, and any areas where the backsplash will stop.
This answers the most useful starting question: where do you begin when tiling a backsplash? Begin with existing conditions and finished boundaries, because tile cannot hide a damp wall, uneven counter line, or poorly planned termination.
Choose the Material and Installation System by Project Goal
The best backsplash material depends on how you cook, clean, maintain, and use the kitchen. It must also suit the wall and the permanence you expect.
| Material | Strengths | Tradeoffs | Best fit |
|---|---|---|---|
| Ceramic or porcelain | Durable, versatile, and available in many sizes and patterns | Requires accurate cutting, setting, grouting, and finishing | A permanent backsplash with flexible design options |
| Glass | Reflects light and creates a bright, clean surface | Cutting and adhesive coverage are less forgiving | A carefully planned feature wall on a flat substrate |
| Natural stone | Distinctive variation and a substantial appearance | Some stones require sealing and more maintenance | A design-led kitchen where variation is intentional |
| Mesh-backed sheets | Small pieces can simplify repeated patterns | Sheets can shift and seams can become visible | Mosaics with careful alignment and seam control |
| Peel-and-stick | Fast, low-mess installation | Depends heavily on a smooth wall and product limitations | A temporary update in a low-risk area |
| Slab | Few grout joints and a continuous visual field | Heavy and dependent on precise fabrication and support | A coordinated countertop and backsplash design |
Match the adhesive to the tile and wall
Thinset and mortar are often used as general terms, but the selected product must match the tile, substrate, location, and manufacturer requirements. Cement-based thinset is common for permanent tile installations. Premixed adhesive may suit certain interior applications, but it is not automatically appropriate for every tile or moisture condition.
Peel-and-stick products have their own preparation requirements. They are not a solution for a damp, greasy, dusty, flaky, or uneven wall. Follow the product instructions for heat exposure, cleaning, permitted surfaces, and edge finishing. If the project includes broader backsplash upgrades with cabinetry, countertops, lighting, or plumbing, choose the installation system as part of the complete kitchen scope.
Measure the Area and Buy the Right Materials
Measure every wall section separately. Multiply width by height, subtract openings where tile will not be installed, and add the sections together. Keep narrow returns and pieces around outlets in the calculation.
| Item | Planning rule |
|---|---|
| Tile | Buy at least 10% extra for a straightforward layout. Increase the allowance for diagonal patterns, herringbone, mosaics, fragile tile, and difficult cuts. |
| Batch or shade | Buy enough from the same batch where possible and mix pieces from several boxes during installation. |
| Trim | Measure exposed vertical, horizontal, window, and outside-corner edges. |
| Adhesive | Use the selected product's coverage rate for the tile size, trowel, and substrate. |
| Grout | Estimate from tile dimensions, joint width, and total area. |
| Protection | Plan coverings, tape, clean water, sponges, mixing tools, and waste containers. |
For example, an 8-foot-wide wall with an 18-inch backsplash height contains 12 square feet. With no significant openings and a straightforward pattern, a 10% allowance brings the target to about 13.2 square feet. Round up to the next full box, then plan trim separately.
Prepare the Wall and Protect the Kitchen
Do not install over wallpaper, peeling paint, grease, loose drywall paper, crumbling compound, active moisture damage, or a surface that prevents bonding. Remove loose material, clean the wall, repair holes, flatten high spots, and replace damaged substrate where necessary.
Protect countertops with a stable, non-scratching covering. Mask cabinet faces and appliance edges, and control dust during removal. Turn off power before removing outlet or switch covers. If an electrical box sits too far behind the finished tile, box extensions or other electrical work may be needed.
Tile follows the plane beneath it. A wall that looks acceptable under paint can create rocking tile, hollow areas, uneven joints, or lippage. Resolve moisture first instead of covering a stain that could indicate a leak or condensation.
Plan the Layout and Difficult Transitions

Dry-lay the tile before applying adhesive. Mark the centerline or dominant visual axis, then work outward to see where cuts fall. Two balanced edge cuts usually look more intentional than a narrow sliver beside a cabinet or window.
Set the first course
The first course establishes every row above it. If the countertop is level and the tile can rest on it securely, it may provide a practical reference. If the counter is uneven, the tile is heavy, or the line must be exact, install a straight ledger board or temporary support at the planned elevation.
Choose grout joints deliberately
Joint width should suit the tile's dimensional variation, edge type, pattern, and manufacturer guidance. Rectified tile may support a narrower joint than irregular tile. A narrow joint does not correct poor alignment, while a wider joint can accommodate variation and become a stronger visual element.
Resolve outlets, corners, windows, and edges
- Outlets: Plan cuts so cover plates hide the edges, and account for finished tile thickness when evaluating box depth.
- Inside corners: Leave the joint for compatible flexible caulk instead of rigid grout.
- Outside corners: Choose a trim profile, finished edge, or return before cutting.
- Windows: Measure the sill, jambs, and head separately.
- Cabinet edges: End the pattern at a deliberate line, not an arbitrary cut.
- Countertops: Leave a consistent joint and finish it with flexible caulk.
Coordinate the Backsplash With Cabinets, Countertops, and Utilities
There is no universal answer to whether the backsplash goes before or after cabinets. Cabinets usually establish finished edges, while the countertop often provides the lower reference. Backsplash installation commonly follows the countertop, but the correct order depends on the design, materials, fabrication, and required measurements.
Coordinate cabinets, countertop templating, appliances, lighting, electrical work, plumbing, ventilation, and wall repairs. A backsplash can change outlet extension needs or reveal a gap that should have been corrected earlier.
For larger projects, professional kitchen remodeling services can integrate the backsplash with layout changes, electrical work, permits, and finish carpentry. Permit requirements depend on scope and jurisdiction. The California Contractors State License Board explains that permits may be required for construction, alteration, repair, improvement, removal, conversion, or demolition, with requirements varying by city and county. Los Angeles County kitchen remodel guidance identifies building, energy, mechanical, green building, electrical, fire, plumbing, and existing-building codes that can apply. Review the applicable building department requirements before work begins. California permit guidance and Los Angeles County kitchen remodel guidance are useful starting points.
Install, Cure, Grout, and Caulk in the Right Sequence

Work in controlled sections. Product instructions govern mixing, open time, coverage, cure time, grout use, and sealing. Do not accelerate the process because the surface looks dry.
Tools and materials checklist
- Tile, trim or edge profiles, spacers, and a compatible grout
- Approved thinset, mortar, premixed adhesive, or peel-and-stick system
- Notched trowel, margin trowel, grout float, level, straightedge, tape measure, pencil, and chalk line
- Manual tile cutter for straight ceramic or porcelain cuts
- Wet saw with the appropriate blade for dense tile, repeated cuts, glass, or difficult shapes
- Tile nippers, rubbing stone, hole saw, or diamond bit for small adjustments and pipe penetrations
- Mixing bucket, drill paddle where permitted, clean water, sponges, and rags
- Drop cloths, painter's tape, surface protection, and waste containers
- Compatible sealer and flexible caulk for materials and movement joints that require them
Cut the difficult pieces before spreading adhesive
Measure each opening from two fixed reference points and transfer the measurements to the tile. Dry-fit every cut before setting it, allowing for the planned joint and enough coverage beneath the outlet cover plate or trim.
- Straight cuts: Use a manual cutter for clean, direct cuts in suitable ceramic or porcelain. Score once with steady pressure, then snap along the score. A wet saw is more reliable for thick, textured, brittle, or repeated cuts.
- Outlets and switches: Use an angle layout, a series of small relief cuts, or a diamond hole saw where the shape requires it. Keep the cutout within the area hidden by the cover plate, without forcing the plate to bridge a large unsupported gap.
- Inside corners: Cut the tile to stop short of the corner joint. Do not force two pieces tightly together, because the corner needs room for flexible caulk.
- Outside corners: Use a trim profile, a factory-finished edge, or carefully finished returns. A raw cut edge should not be left exposed.
- Windows: Cut sill, jamb, and head pieces separately. Use a level and consistent joint width so the reveal looks intentional from both directions.
- Cabinet edges: Plan the final visible cut against the cabinet or trim line. Nippers can refine small adjustments, while a rubbing stone softens a sharp cut edge.
- Curves and pipe penetrations: Drill from the face with the proper diamond bit or make several small cuts, then refine the opening. Do not rely on grout to hide a poorly fitting hole.
- Prepare the adhesive. Mix thinset or mortar as specified, or prepare premixed adhesive according to its instructions.
- Comb the adhesive. Use the specified trowel consistently and spread only what can be tiled within the working time.
- Back-butter where appropriate. Larger, irregular, heavy, or demanding tile may need adhesive on the back as well as the wall.
- Set the first course. Follow the reference line, check level, and keep adhesive out of joints.
- Use spacers. Check alignment, joint width, plane, and pattern after every few pieces.
- Cut penetrations. Dry-fit pieces around outlets, switches, windows, plumbing, corners, and cabinet edges.
- Clean and cure. Remove squeeze-out and allow the installation to cure for the specified time.
- Grout. Pack joints fully, remove excess diagonally, and keep grout out of movement joints.
- Seal where required. Some natural stone and grout systems require sealing. Follow the product requirements.
- Caulk movement joints. Use compatible flexible caulk at corners, countertop transitions, and other changes of plane.
Method notes
Standard tile: Work in manageable sections and keep the pattern aligned. Match the cutting method to the material and cut complexity.
Mesh-backed sheets: Align the first sheet carefully, prevent shifting, and inspect sheet seams before the adhesive firms up.
Peel-and-stick: Use only on a smooth, clean, dry wall within the product's heat, moisture, and cleaning limits.
Slab: Fabrication, transport, support, outlets, seams, and caulking require careful professional coordination.
Inspect the Work and Troubleshoot Visible Problems
Check the substrate before installation, the first course after setting, every sheet for alignment, the joints before grouting, and the caulk for continuous bonding.
| Problem | Likely cause | Response |
|---|---|---|
| Loose tile | Poor coverage, contamination, movement, or unsuitable adhesive | Remove the piece, inspect contact and substrate, and correct the cause. |
| Cracked tile | Movement, impact, unsupported edge, or installation defect | Replace it only after assessing adjacent pieces and the wall. |
| Uneven rows | Uncontrolled first course or drifting reference lines | Correct while adhesive remains workable. |
| Lippage | Uneven substrate, warped tile, or inadequate bedding | Remove and reset severe high-low edges before grouting. |
| Shifting sheets | Excess adhesive, inadequate support, or pressure | Realign while workable and inspect adjacent seams. |
| Failed grout or caulk | Movement joint grouted, dirty surface, or premature exposure | Remove, clean, and reinstall the compatible product. |
Decide Between DIY and Professional Installation
DIY installation is most reasonable when the wall is sound and flat, the pattern is straightforward, the material is manageable, and there are few penetrations. A small rectangular-tile project can suit someone comfortable with measuring, cutting, cleanup, and curing times.
Use a professional when the wall needs substantial repair, the project includes electrical or plumbing changes, or the backsplash uses natural stone, glass, large-format tile, or a slab. Professional help also makes sense when the backsplash must align precisely with new cabinets, countertops, lighting, or appliances.
California licensing rules apply in specified circumstances. The Contractors State License Board states that a current valid license is required for work involving a building permit, employee labor, or contracts valued at $1,000 or more in combined labor and materials, among other conditions. Verify the requirements for the project and jurisdiction. California contractor licensing guidance explains the framework.
Prepare a Professional Scope for a Bell Gardens Kitchen
A clear scope helps compare estimates and prevents the backsplash from conflicting with the rest of the kitchen. Provide marked photographs or a drawing showing dimensions, openings, outlets, appliances, countertops, cabinets, and termination points.
- Backsplash areas, heights, exposed edges, windows, corners, and countertop interfaces.
- Demolition, disposal, wall repairs, substrate replacement, and moisture concerns.
- Material, pattern, batch, trim, edge profiles, and grout color.
- Adhesive, mortar, grout, sealer, caulk, and product requirements.
- Outlet, switch, lighting, plumbing, ventilation, and appliance coordination.
- Protection, cleanup, curing, punch-list inspection, and exclusions.
- Responsibility for design, final measurements, permits, inspections, trade coordination, and changes.
For a kitchen where backsplash work connects to cabinetry, countertops, lighting, electrical, plumbing, or finish carpentry, a coordinated scope is more useful than a tile-only line item. JR07 Development's accepted service information covers kitchen remodeling across Southern California and Los Angeles County.
Questions Homeowners Commonly Ask About Backsplash Installation
Can a backsplash be installed over existing tile or painted drywall?
Sometimes, if the surface is firmly bonded, clean, flat, dry, and approved for the installation system. Loose tile, glossy or peeling paint, grease, damaged drywall, and moisture problems must be corrected first.
Should the backsplash be installed before or after countertops and cabinets?
Cabinets and countertops usually establish finished dimensions, so backsplash installation commonly follows them. The exact sequence depends on the design and materials.
Does a kitchen backsplash installation in Bell Gardens require a permit?
There is no single backsplash-only answer. Requirements depend on scope and jurisdiction, especially if the work changes walls, electrical, plumbing, ventilation, structure, or other regulated systems.
How much extra tile should be purchased?
Start with about 10% for a straightforward layout. Use a larger allowance for diagonal patterns, herringbone, mosaics, fragile material, and many cuts.
When is peel-and-stick tile reasonable?
It can suit a temporary update on a smooth, clean, dry interior wall when the product's heat, moisture, and cleaning limits fit the location. It is less suitable for an uneven wall or highly permanent installation.
What should a contractor include in an estimate?
The estimate should identify measurements, demolition, preparation, material, pattern, trim, adhesive, grout, sealing, caulking, outlet and edge details, protection, cleanup, schedule assumptions, permits if applicable, exclusions, and final-measurement responsibility.
Before ordering materials, decide whether the project is a controlled tile installation or part of a larger kitchen renovation. If you want a coordinated scope for cabinetry, countertops, backsplash, and related work, JR07 Development's kitchen remodeling services provide a relevant starting point.