
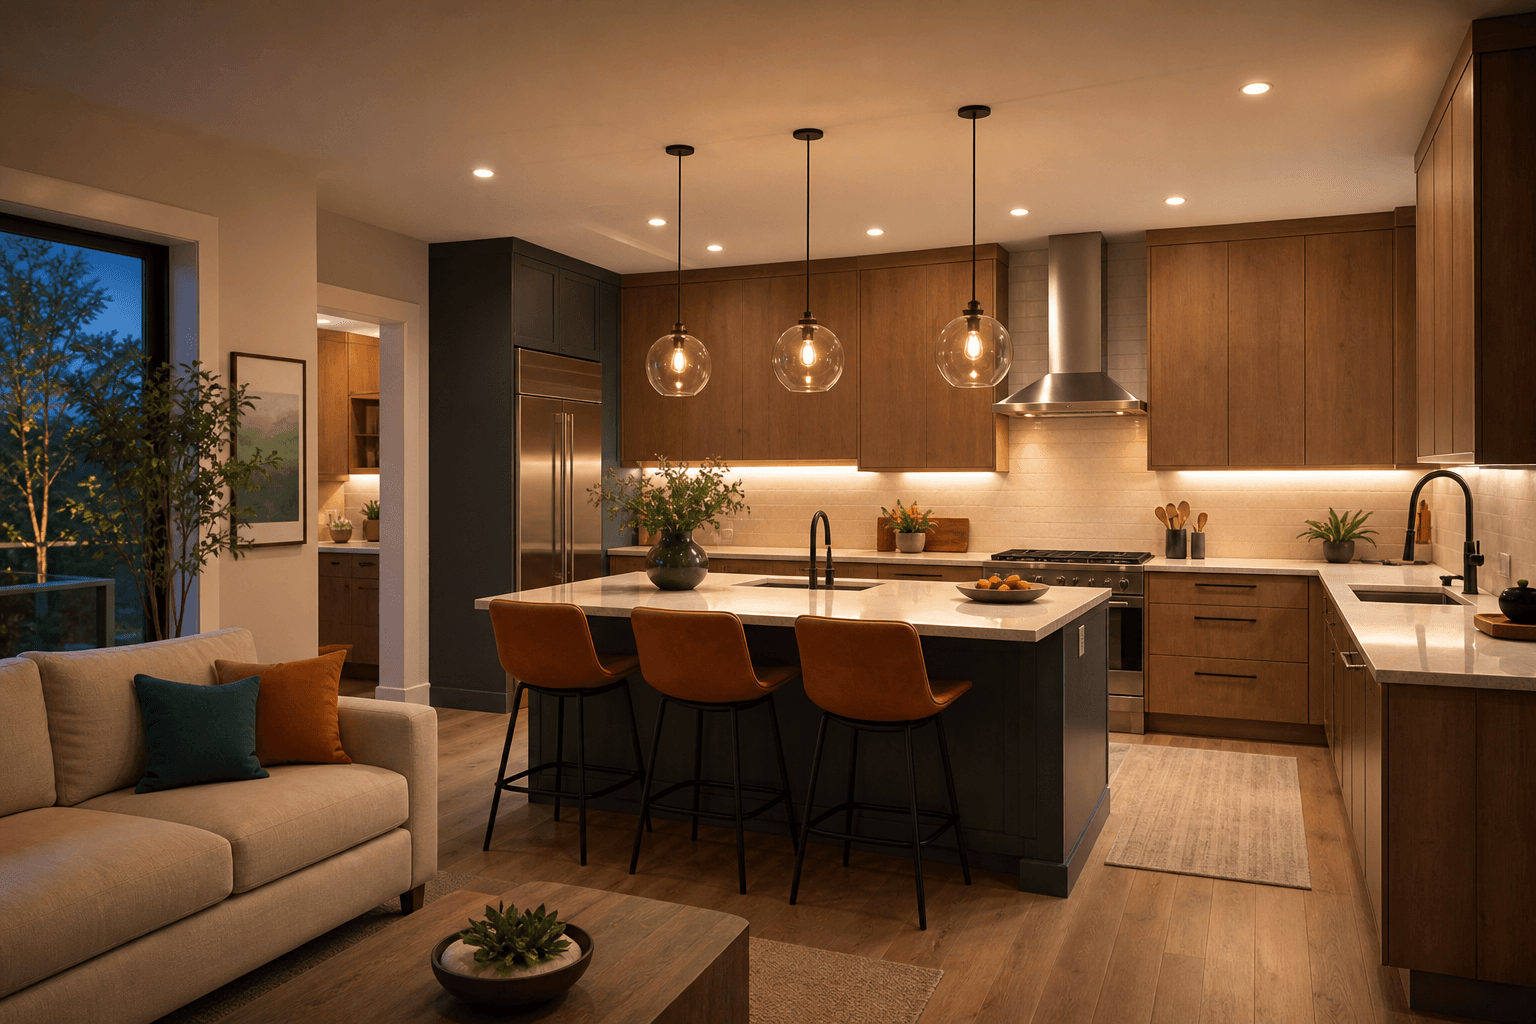
Good kitchen lighting design starts with the room’s layout and the work each area must support. Map the island, perimeter counters, sink, range, pantry, dining area, and walkways, then choose fixtures for coverage, glare control, visual consistency, and style instead of spacing lights uniformly. Related reading: Accessible Kitchen Design for Safer, Easier Cooking.
The strongest plan balances three needs: enough light for food preparation and cleanup, comfortable illumination for circulation and meals, and fixtures that suit the ceiling, cabinets, finishes, and proportions of the room. A remodel is the right time to resolve those choices before electrical locations and surfaces are fixed.
Start With the Kitchen’s Work Zones
Lighting decisions should follow the way the room works. Mark the surfaces where you prepare food, wash dishes, cook, store ingredients, eat, and move through the space before choosing fixture locations.
- Island or peninsula: Identify whether it is used for food preparation, seating, serving, or several of these activities.
- Perimeter counters: Mark preparation areas, appliance landing spaces, and sections that need direct light.
- Sink: Plan light for the basin without placing a bright source where your head or upper cabinets create a shadow.
- Range or cooktop: Coordinate lighting with the hood, upper cabinets, and the person standing at the cooking surface.
- Pantry and storage: A pantry, tall cabinet, or deep corner needs useful interior visibility, not only light from the ceiling.
- Dining area: Decide whether this area needs a separate decorative layer for meals and entertaining.
- Walkways: Trace routes between the kitchen, adjacent rooms, refrigerator, pantry, and exterior doors.
Layout redesign affects every one of these decisions. When kitchen remodeling services include cabinetry, appliance integration, electrical upgrades, and changes to the room arrangement, fixture locations should be developed alongside those elements.
Choose a Lighting Strategy Before Choosing Fixtures
Ambient, task, and accent lighting describe the jobs your fixtures perform. They are not three mandatory fixture packages, and one fixture can sometimes serve more than one role.
| Lighting role | What it should accomplish | Typical options |
|---|---|---|
| Ambient | Provide comfortable general visibility through the room and along circulation paths. | Recessed lights, flush mounts, linear ceiling fixtures, or well-aimed track lighting. |
| Task | Put useful light on counters, the sink, range, island, and other work surfaces. | Undercabinet lights, pendants, carefully placed recessed fixtures, or sconces. |
| Accent | Highlight cabinets, shelving, a backsplash, architectural details, or a decorative centerpiece. | Cabinet-integrated lights, wall washing, toe-kick lighting, or decorative fixtures. |
Start with task requirements, then fill in ambient coverage and add accent lighting where it improves the room. This order prevents a common design problem: a kitchen that looks bright from the doorway but leaves the counter where you work in shadow.
Recessed lights, flush mounts, linear fixtures, and some track-lighting arrangements can provide ambient illumination. Undercabinet lighting, pendants, sconces, and carefully positioned recessed lights can serve task functions. Accent lighting should add depth, not compensate for missing work-surface light.
A Zone-by-Zone Kitchen Lighting Plan

Use this illustrative plan as a starting framework, not a fixed fixture count. The number and location of fixtures depend on room dimensions, ceiling height, beam spread, cabinet depth, surface reflectance, and existing electrical conditions.
| Zone | Primary lighting need | Possible fixture approach | Control idea |
|---|---|---|---|
| Island | Food preparation, serving, and seating | Pendants, a linear pendant, or aligned recessed task lighting | Separate island control with dimming where appropriate |
| Perimeter counters | Continuous work-surface visibility | Undercabinet lighting supported by ceiling or wall fixtures | Separate undercabinet and general groups |
| Sink | Light at the basin without a body shadow | Recessed light, small pendant, or sconce selected around the user’s position | Task group or counter group |
| Range | Visibility while cooking and cleaning | Hood-integrated light plus coordinated ceiling or cabinet lighting | Coordinate with hood and work-zone controls |
| Pantry | Visibility inside shelves and at the entry | Ceiling fixture, vertical light, or cabinet-integrated solution | Separate switch or suitable occupancy control |
| Dining area | Comfortable light for meals and entertaining | Chandelier, pendant, or decorative linear fixture | Separate dimmable decorative group |
| Walkways | General circulation | Ambient ceiling lighting with consistent output | General group with switches based on entry points |
An island kitchen might use one ambient group for circulation, a separate island group, an undercabinet group for perimeter counters, and a low-level accent or dining group. This arrangement lets you use only the light needed for a late-night snack while retaining full coverage for meal preparation.
Use the table to identify omissions in a proposed plan. If the drawing shows ceiling fixtures but no dedicated solution for the pantry, sink, range, or counter edge, the design is not yet responding to how the room will be used.
Choose Fixtures by Job, Ceiling, and Layout
There is no single best kitchen fixture. Choose each type according to the job it must perform, ceiling conditions, visual character, and installation difficulty.
| Fixture type | Works well when | Watch for |
|---|---|---|
| Recessed or pot lights | You need discreet ambient or task coverage and the ceiling can accommodate installation. | Incorrect alignment can leave the counter face in shadow or create glare. |
| Pendants | An island or peninsula needs focused light and a decorative feature. | Size, height, sightlines, and quantity must suit the island and seating. |
| Linear fixtures | A long island or counter needs visually continuous coverage. | Coordinate with cabinet lines, ceiling junctions, and surface length. |
| Undercabinet lights | You want direct light on perimeter counters. | Plan wiring, switching, concealment, and backsplash coordination early. |
| Sconces | A wall has usable space near a sink, shelf, or dining area. | Cabinets, windows, mirrors, and doors can limit placement. |
| Track lighting | Ceiling access is limited or several zones need adjustable aiming. | Visible hardware may not suit every design, and poor aiming can cause glare. |
| Chandeliers | A dining area or large island needs a decorative focal point. | Scale, clearance, cleaning, and sightlines matter. |
| Flush mounts | A low ceiling or compact area needs surface-mounted ambient light. | One fixture may not provide enough work-surface light. |
Choose recessed lighting for a quiet ceiling when you have enough access for proper placement. Choose pendants or a linear fixture when the island is a major visual and functional element. Use undercabinet lighting when the counter itself needs direct illumination, not just a brighter room.
Use the ceiling and room proportions as filters
Low ceilings usually favor flush mounts, shallow recessed fixtures, or carefully scaled linear options. Higher ceilings can accommodate pendants and chandeliers, but the fixture still needs to illuminate the intended surface without blocking views across the room.
A long island often benefits from a linear fixture or a balanced row of pendants. A compact peninsula may need one appropriately scaled pendant or recessed task lighting instead of several hanging fixtures that crowd the passage.
Adapt the Plan to Your Kitchen Layout
The room shape determines how light should travel and where fixtures can be placed. Treat these as planning patterns, then adjust them to the actual cabinet and appliance plan.
Galley kitchens
A galley kitchen has two opposing runs, so the challenge is even coverage without excessive glare from reflective surfaces. Use consistent ambient lighting through the length of the room, then add undercabinet lighting to the work surfaces that need it most. Avoid decorative pendants that narrow the passage.
L-shaped kitchens
An L-shaped kitchen needs separate attention for each leg and deliberate light in the inside corner, where two cabinet runs can create a dark area. If the L opens into a dining or living area, separate the kitchen and adjacent controls.
U-shaped kitchens
U-shaped layouts place the user between cabinets on three sides. Align ceiling fixtures to illuminate counter fronts, not only the center of the floor. Undercabinet lighting is especially useful where upper cabinets block room light.
Open-plan kitchens
Coordinate the kitchen with adjacent living or dining areas. Use task groups for work and a separate decorative group for dining so the room feels connected without every fixture being on at once. Check sightlines from sofas, dining chairs, and entry paths.
Kitchens with an island or peninsula
Light an island according to its use. Food preparation calls for useful, low-glare task light, while seating may justify a decorative fixture with a softer setting for conversation.
Light Counters and Islands Without Shadows or Glare

Countertop lighting works best when the source is positioned between the ceiling, cabinet face, and user. It should put light where your hands work without shining directly into your eyes or reflecting sharply from the counter.
- Align recessed or ceiling fixtures with usable counter depth, not automatically with the room center.
- Consider the counter edge and upper-cabinet depth. A light too far toward the wall may illuminate the backsplash while leaving the front work area dim.
- Use undercabinet lighting to fill the shadow created by upper cabinets, with the source concealed or positioned outside your normal field of view.
- Review polished stone, glass, glossy tile, stainless steel, and lacquered cabinets as reflective surfaces.
- Check the plan from the standing height of the people who will use the kitchen.
For island pendants, a common design starting point is to place the bottom of the fixture roughly 30 to 36 inches above the countertop, then adjust for fixture size, ceiling height, seated sightlines, and the people using the room. This is design guidance, not a universal code dimension.
Ask for a reflected ceiling plan or marked-up layout that shows the relationship between each fixture and the counter edge. A fixture can be centered in the room and still be poorly positioned for the person standing at the work surface.
Choose Color Quality for the Materials You Are Installing
Light quality affects how cabinets, counters, food, paint, stone, and tile appear. Select color temperature and color-rendering characteristics as a coordinated set instead of choosing each fixture independently.
Color temperature
Warm light generally creates a relaxed atmosphere, while cooler light can feel crisper and more energetic. The useful choice depends on finishes, daylight, adjacent spaces, and the mood you want. Use one coherent family of light sources across ceiling, undercabinet, island, and dining fixtures.
Color rendering
Color rendering matters because you regularly judge food, wood, paint, stone, and tile under the installed lighting. Review the fixture’s stated color-rendering information and compare samples under the proposed light before ordering a large group.
Consistency is usually more valuable than choosing the highest specification for one fixture. Mixing visibly different light colors between the ceiling, cabinet underside, and island can make a carefully coordinated kitchen feel mismatched.
Build a Useful Lighting Cost Scope
A lighting allowance is difficult to compare if it combines fixtures, electrical work, access, and finish repair into one unexplained number. Ask for separate line items.
| Cost-scope item | What to define |
|---|---|
| Fixtures | Types, quantities, finishes, decorative allowances, and supplier responsibility. |
| Electrical labor | Installation, removal, relocation, boxes, switches, and testing. |
| Wiring and circuits | Whether wiring is reused, extended, separated, or upgraded. |
| Controls | Dimmers, switches, locations, compatibility, and smart equipment. |
| Ceiling access and repair | Access, drywall removal, patching, texture, painting, and concealed wiring. |
| Cabinet integration | Channels, concealed wiring, light locations, shelves, and backsplash conditions. |
| Installation complexity | Ceiling height, difficult access, structural conflicts, occupied-home protection, and sequencing. |
The cost difference between two lighting plans often comes from installation conditions, not just fixture prices. Reusing an accessible ceiling location is a different scope from relocating it, opening a finished ceiling, adding separate controls, repairing surfaces, and coordinating cabinet-integrated lighting. Related reading: Lighting installation kingston tn.
Ask whether the estimate includes fixture procurement, delivery, installation, lamps or integrated sources, dimmers, patching, finish touch-ups, and final adjustment. If an item is excluded, record who will perform it and when it must be complete.
Keep Wiring and Controls in the Design Conversation
Controls affect how useful the finished design feels, but they should support the fixture and layout decisions rather than dominate them. Separate ambient, island, undercabinet, dining, and accent groups when those areas serve different purposes.
Plan switch locations around the room’s entry points and normal work paths. Under-cabinet wiring, island boxes, sconces, and fixture drivers also need to be coordinated with cabinet dimensions and finish work before surfaces are closed.
For residential projects, California’s 2025 Building Energy Efficiency Standards address indoor lighting and controls. The applicable requirements depend on whether lighting is newly installed or altered and on the project scope. Review the relevant California lighting requirements and the 2025 Building Energy Efficiency Standards before finalizing the plan.
Questions to Ask Before Approving the Plan
- Which work zones does each fixture serve?
- Where will light fall on the counter, island, sink, and range when someone is standing there?
- Which locations reduce shadows from upper cabinets and the user’s body?
- How will polished counters, glass, stainless steel, and glossy backsplash surfaces affect glare?
- Which groups have separate switches or dimming controls?
- Are the proposed fixtures and dimmers compatible?
- Who supplies the fixtures, and what happens if a selected fixture changes size or electrical requirements?
- When will cabinet details, backsplash work, ceiling access, and electrical rough-in be coordinated?
- Which existing fixtures are altered, removed, or retained?
- What code, permit, inspection, and jurisdiction questions apply?
- Which fixture, wiring, control, patching, and installation costs are included?
- How will the completed system be tested?
A Lighting Brief You Can Hand to Your Remodeler
Before requesting an estimate, prepare a one-page brief with room dimensions, ceiling height, cabinet layout, appliance locations, island or peninsula dimensions, pantry and dining areas, and the paths people use most often. Mark counters that need focused light and note existing fixtures you want to keep or remove.
Add your preferred fixture character, finish direction, color-temperature preference, color-rendering expectations, dimming, and control groups. List questions about ceiling access, wiring, code coordination, cabinet integration, backsplash timing, fixture allowances, exclusions, and final testing.
That brief gives a contractor something more useful than a request for “better lighting.” For a coordinated kitchen scope covering layout, cabinetry, appliances, electrical work, and finish installation, JR07 Development provides kitchen remodeling services for homeowners in Los Angeles County.