
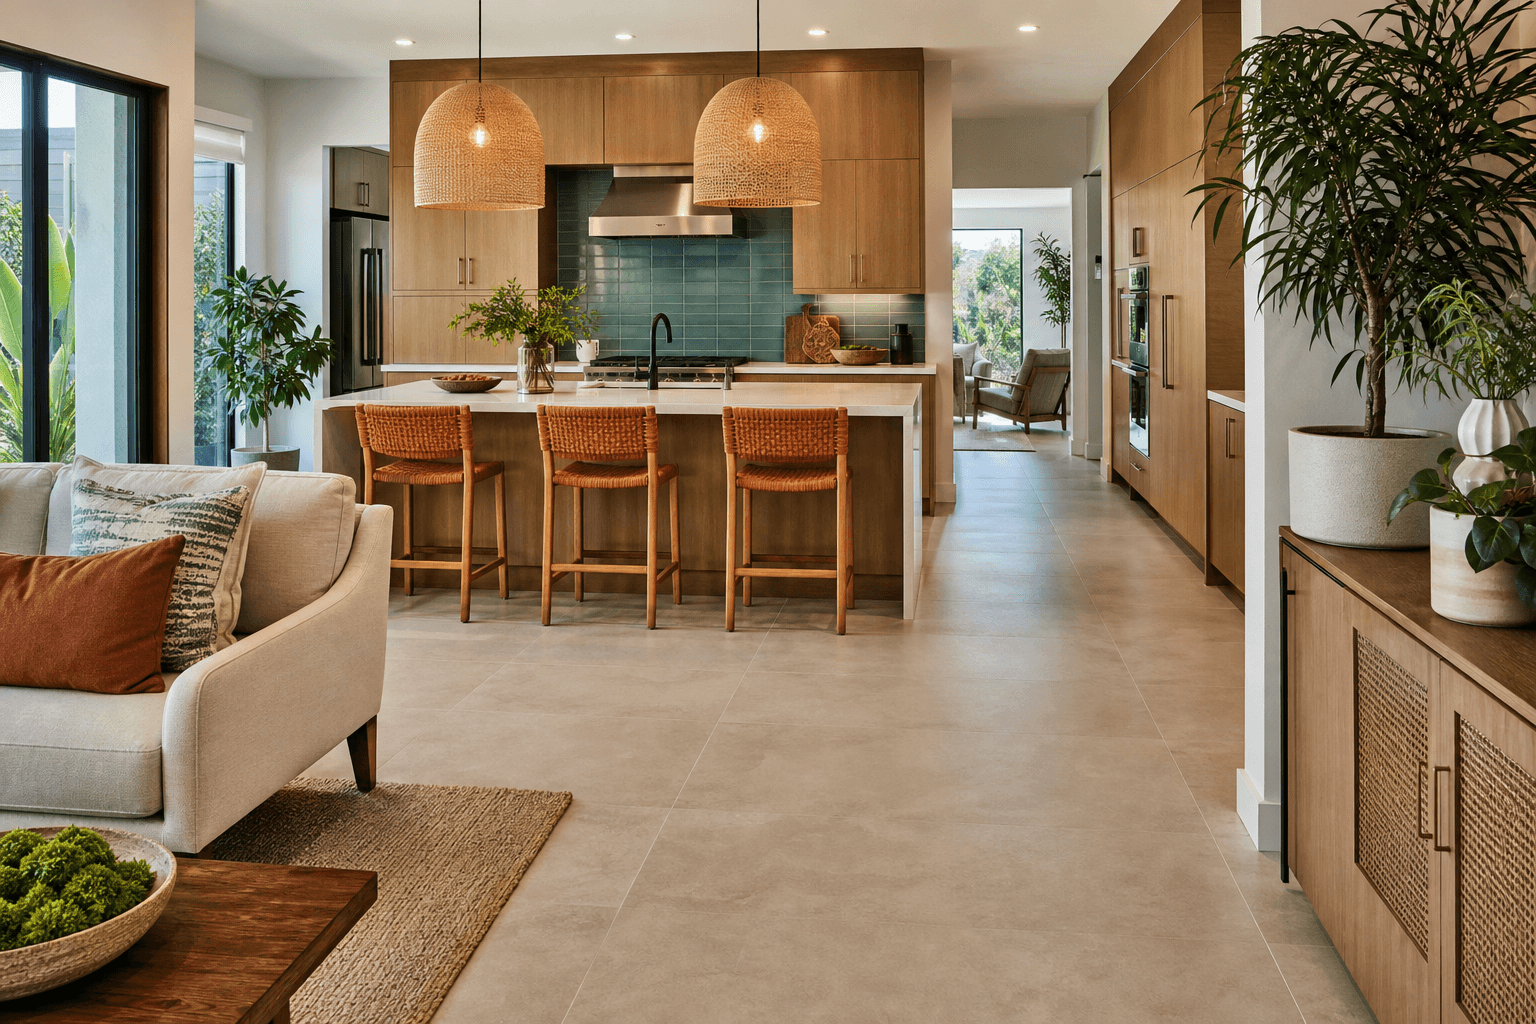
For most kitchen remodels, kitchen flooring materials such as porcelain or ceramic tile and LVP are the first options to compare. Tile offers a hard, highly durable surface with extensive design flexibility, while LVP is generally warmer and simpler to replace in sections. The right choice depends on spills, standing comfort, traffic, subfloor condition, adjacent-floor transitions, project scope, and how the cabinets will be sequenced.
Kitchen Flooring Materials at a Glance
There is no single best kitchen floor for every home. The strongest choice balances moisture exposure, traffic, comfort, maintenance, appearance, repairability, and the condition of the floor below it.
| Material | Best fit | Main advantage | Important limitation |
|---|---|---|---|
| Porcelain or ceramic tile | Busy kitchens, frequent spills, and long service expectations | Hard, highly versatile surface with strong moisture tolerance when properly installed | Harder underfoot, grout requires care, and installation depends heavily on substrate preparation |
| LVP | Comfort, faster-looking updates, and wood-style design | Warmer and quieter than tile, with plank-level replacement possible for some systems | Joints, edges, subfloor moisture, and product quality still determine performance |
| Engineered hardwood | Open-plan kitchens that need continuity with nearby living areas | Natural wood appearance with more dimensional stability than solid hardwood | Standing water and leaks still require prompt attention |
| Solid hardwood | Homes where a continuous wood floor and future refinishing matter | Can be sanded and refinished when the construction and finish allow it | Requires disciplined moisture management and careful detailing at wet areas |
| Laminate | Decorative wood or stone appearance within a controlled, dry-use setting | Wide range of looks and generally simple routine cleaning | Damage to the decorative surface is difficult to refinish, and moisture at joints is a concern |
| Natural stone | Distinctive, premium material palettes and high visual impact | Each installation has natural variation, texture, and substantial visual presence | Porosity, sealing, uneven surfaces, weight, and installation complexity require planning |
| Cork | Homeowners prioritizing a softer, warmer surface and visual texture | Comfortable feel and a less conventional appearance | Moisture, sharp impacts, finish damage, and matching repairs need careful consideration |
Tile and LVP are practical starting points because they address many kitchen concerns without forcing the same design language. A current color or pattern may suit your kitchen, but “popular” does not mean universally appropriate. The newest-looking floor will still disappoint if it creates an awkward transition, conflicts with cabinet height, or cannot tolerate how your household uses the room.
Choose the Material by Your Kitchen’s Hardest Problem
Start with the condition that would bother you most if the floor performed poorly. That usually narrows the field faster than beginning with color or a product photograph.
- If frequent spills are the main concern: start with porcelain or ceramic tile, then compare a suitable LVP system. Focus on the complete installation, including joints, perimeter edges, transitions, and the subfloor, not just the label on the product.
- If pets, children, and heavy traffic dominate: compare tile for hard-surface durability with LVP for comfort and easier plank-level replacement. Review scratch, dent, chip, and repair expectations before choosing.
- If you stand at the counters for long periods: LVP, cork, or engineered hardwood may feel more forgiving than tile. A softer floor does not remove the need for good traction, stable transitions, or prompt cleanup.
- If the kitchen opens into a living or dining area: engineered hardwood or solid hardwood can create visual continuity. Tile or LVP can also work, but the transition detail and relationship to the existing floor should be planned early.
- If the update is limited and disruption matters: LVP may offer a practical route when the existing substrate is sound and the finished height works with doors, appliances, and adjacent floors. A limited scope still needs a substrate and transition review.
- If low maintenance is the priority: choose a surface that can be cleaned with the routine you will actually follow. Smooth, well-installed tile is straightforward to clean, while textured surfaces and grout add more areas to maintain.
- If a premium natural palette is central to the design: consider natural stone, hardwood, or engineered hardwood, but accept the additional moisture, sealing, refinishing, or matching decisions that accompany them.
Hypothetical busy-family scenario: A family that cooks daily, tracks in grit, and regularly handles spills may prefer tile if maximum hardness and moisture tolerance outweigh underfoot comfort. The same family may choose LVP if quieter walking, easier plank replacement, and a warmer feel matter more.
Hypothetical open-plan scenario: If the kitchen shares one continuous floor with the living room, engineered hardwood may make the space feel more unified. Tile can still be the better technical choice near a heavily used sink or cooking zone, but a deliberate material break is preferable to an accidental mismatch.
Hypothetical limited-update scenario: A homeowner keeping the cabinets and appliances may narrow the choice to materials that fit beneath existing clearances and meet the adjacent-floor height. The least disruptive material is not automatically the least expensive once removal, leveling, trim, and appliance movement are included.
Tile vs. LVP: Which Tradeoff Fits Your Remodel?
Choose tile when a hard, highly durable surface and broad design flexibility are your leading priorities. Choose LVP when comfort, quieter use, wood-style appearance, and a simpler section-by-section replacement approach carry more weight.
| Decision factor | Porcelain or ceramic tile | LVP |
|---|---|---|
| Water behavior | The tile surface itself does not absorb water like wood, but grout, movement joints, edges, and the layers below still need correct detailing. | Many products resist water at the surface, but plank joints, perimeter gaps, adhesive or locking systems, and the subfloor remain part of the moisture strategy. |
| Comfort | Hard and often cooler underfoot. Rugs or planned comfort zones can help where appropriate. | Typically warmer and quieter underfoot, especially in a kitchen where you stand for extended periods. |
| Cleaning | Routine cleaning is straightforward, but grout joints can collect soil and require more attention than the tile faces. | Usually simple to sweep and damp-clean, with texture and seams affecting how easily residue is removed. |
| Scratches and impact | Resists everyday surface wear well, but a hard impact can chip or crack a tile or grout joint. | Can resist ordinary wear, but sharp impacts, heavy point loads, and dragging furniture can scratch or dent some products. |
| Repairability | A damaged tile can often be removed and replaced if a matching spare and suitable access are available. | A damaged plank can sometimes be replaced individually, although matching the color, batch, locking system, and discontinued product can be difficult. |
| Appearance | Supports stone, concrete, wood-look, geometric, and large-format styles with many grout choices. | Offers wood and stone visuals with a softer, more continuous appearance and fewer grout lines. |
| Installation | Requires a stable, sufficiently flat substrate, correct setting materials, movement accommodation, layout planning, and grout or sealant detailing. | Still requires a clean, sound, appropriately flat substrate and careful planning around fixed cabinets, walls, appliances, and transitions. |
| Floor height | Tile assembly height can affect doors, appliance clearances, baseboards, and transitions. | Often supports a lower-profile assembly, but underlayment and existing floor conditions still determine the final height. |
| Remodel suitability | Strong fit for a full remodel where the substrate, layout, cabinets, and finish details are being coordinated together. | Strong fit for a controlled update when the existing conditions support the product and the desired appearance. |
When tile is the stronger choice
Tile deserves priority when the kitchen receives intense traffic, frequent spills, rolling loads, or a design that benefits from large-format surfaces and carefully selected grout. It is also useful when you want the floor to remain visually distinct from wood flooring in adjacent rooms.
The tradeoff is a harder surface and less forgiving installation. Small variations in the substrate can telegraph through the finished work, and uneven transitions become especially noticeable beside cabinetry, islands, or nearby floors.
When LVP is the more practical choice
LVP can make sense when standing comfort, acoustic softness, wood-style continuity, and a contained update are more important than a tile surface. It can also simplify a future localized repair, provided spare material is retained and the product can be accessed without damaging surrounding planks.
Do not treat “waterproof” as a promise that the entire floor assembly will tolerate an unresolved leak. LVP still depends on the condition of the subfloor, the installation system, perimeter details, and how quickly standing water is removed.
Waterproof, Water-Resistant, and What Happens Underneath
A waterproof or water-resistant surface is only one layer of a kitchen floor. Seams, edges, transitions, adhesives, perimeter gaps, cabinets, and the subfloor determine what happens when water moves beyond the top face.
With tile, the tile itself may shed water effectively, but grout is not the same as a continuous sheet membrane. Cracked grout, failed sealant, movement, an unprotected perimeter, or a leak from a dishwasher or supply line can allow moisture to travel below the visible floor.
With LVP, water can enter through plank joints, cut edges, doorways, appliance openings, or perimeter details. A floor that resists surface spills is not a substitute for correcting a leaking pipe, drying the substrate, or addressing moisture trapped below the finished floor.
California’s cited residential mandatory measures state that when resilient flooring is installed, at least 80% of the floor area receiving resilient flooring must meet the specified indoor-emissions testing requirements. Include that requirement in the material and installation discussion for a California remodel, and ask which documentation applies to the selected product: California’s resilient flooring measures.
For any material, identify likely leak sources before installation. Dishwasher connections, refrigerator water lines, sink plumbing, ice-maker supplies, and transitions at exterior or adjacent rooms deserve attention because serious damage may begin below a floor that still looks intact.
The Other Kitchen Flooring Materials Worth Considering
Engineered hardwood
Engineered hardwood is often a strong fit for an open-plan kitchen because it provides a genuine wood surface with a construction designed to be more dimensionally stable than solid wood. It still needs prompt spill cleanup, careful installation, and a plan for leaks around appliances and plumbing.
Choose it when continuity, natural grain, and a refined residential feel matter more than maximum tolerance for standing water. Review the wear layer, finish, transitions, and repair expectations instead of treating every engineered product as equivalent.
Solid hardwood
Solid hardwood can suit a kitchen that already has wood flooring or a homeowner who values future refinishing. Its serviceability depends on the species, thickness, finish, installation, and whether enough material remains for future sanding.
It requires more moisture discipline than tile and should not be selected simply because it looks warm in a sample. Confirm how the floor will meet tile, stone, cabinetry, and areas where water is most likely to collect.
Laminate
Laminate offers many decorative patterns and can be comfortable underfoot. Its main vulnerability is damage to the printed and wear layers, especially where water reaches joints or edges.
Laminate can work in a controlled kitchen with careful spill habits and a suitable product, but it is less forgiving of prolonged moisture than a well-planned tile installation. Ask how damaged sections are replaced and whether matching material will be retained.
Natural stone
Natural stone creates variation and depth that manufactured materials cannot duplicate exactly. Granite, slate, limestone, and other stones differ in porosity, texture, hardness, maintenance, and sealing needs, so “stone” is not one performance category.
Stone is best for a design where its character justifies the added planning. Samples should be viewed beside the countertops and cabinetry, and the installation scope should address substrate strength, flatness, grout, sealing, and transitions.
Cork
Cork offers a warmer, softer feel and distinctive visual texture. It may suit a homeowner who prioritizes standing comfort, but moisture exposure, finish damage, sharp impacts, and future matching deserve a careful discussion.
Use cork selectively in a kitchen where spills can be controlled and the finish system is appropriate for the room. It is a specialized choice, not a universal substitute for tile or LVP.
Coordinate Flooring With Cabinets, Appliances, and Adjacent Rooms
Flooring should be planned alongside the kitchen layout, not after every other decision is fixed. Demolition can reveal leveling needs, old adhesive, damaged subfloor, or height differences that change the material and installation sequence.
- Record existing conditions. Photograph the current floor, doorways, baseboards, cabinet toes, appliance openings, and transitions into nearby rooms.
- Assess the substrate. Identify uneven areas, movement, moisture concerns, damaged panels, and areas that need leveling or repair before the finished material is selected.
- Decide whether cabinets are staying or moving. A floating floor, tile assembly, or wood floor may require a different edge and sequencing detail depending on the cabinet plan.
- Check finished height. Account for tile, underlayment, setting materials, flooring thickness, appliance legs, doors, baseboards, and transition profiles.
- Coordinate utilities and fixed elements. Islands, plumbing, electrical work, appliances, and ventilation can affect demolition and the order of installation.
- Plan transitions before ordering material. A transition should look intentional and accommodate the height, movement, and edge behavior of both floors.
If the project includes layout changes, cabinetry, countertops, flooring, backsplash work, or electrical and plumbing upgrades, compare the floor as part of the broader kitchen remodeling scope. Coordinating these trades early reduces the chance that a finished floor must be cut, patched, or raised to accommodate a later decision.
Flooring does not always need to run under every cabinet, and the correct approach depends on the material, cabinet plan, appliance requirements, and installation system. Have the installer define the perimeter and sequencing in writing before demolition begins.
Make the Floor Work Visually With the Kitchen
Choose samples beside the actual cabinet, countertop, backsplash, island, and lighting selections. A floor that looks balanced alone can become too busy beside patterned stone, too yellow beside warm wood, or too reflective under strong downlights.
- Scale: Large-format tile can reduce grout lines in a spacious kitchen, while smaller tile may suit a tighter layout or a more detailed pattern.
- Color: Compare undertones, not just light versus dark. Gray, beige, white, brown, and black can each lean warm, cool, green, red, or blue.
- Texture: Textured floors can add traction and hide soil, but deep texture may require more cleaning. Very smooth surfaces can show reflections and crumbs more readily.
- Grout: Grout width and color change the visual scale of tile. A high-contrast grout emphasizes the grid, while a closer color creates a quieter field.
- Contrast: A floor should separate visually from cabinets enough to define the room without competing with the countertop or backsplash.
- Transitions: Check the view from the living room, hallway, and main entry. The transition line should align with a logical boundary rather than interrupt a prominent sightline.
For tile, compare the material, finish, edge, layout, grout, and installation details together instead of choosing a tile face in isolation. A related premium tile selection guide can help you evaluate the broader tile decision before finalizing the floor.
Build a Realistic Flooring Scope and Compare Estimates
A useful flooring estimate separates the work required to deliver a finished floor from the material itself. Two estimates can name the same flooring but differ substantially in demolition, substrate preparation, trim, transitions, and appliance handling.
- Material quantity: Identify the measured area, waste allowance, pattern direction, stair or closet areas, and whether spare material is included.
- Demolition: State what is removed, how adhesive or mortar is handled, and whether baseboards, thresholds, or toe-kicks are removed and replaced.
- Disposal: Clarify debris loading, haul-away, disposal fees, and protection for the rest of the home.
- Substrate preparation: Separate routine cleaning from patching, leveling, moisture treatment, panel replacement, crack isolation, or other corrective work.
- Installation system: Name the underlayment, adhesive, mortar, grout, sealant, fasteners, or transition profiles included in the scope.
- Trim and transitions: Include baseboards, quarter-round or other edge details, reducers, thresholds, and the finish at cabinets and appliances.
- Appliance and furniture handling: State who disconnects, moves, protects, and resets appliances or heavy furnishings.
- Cleanup and protection: Confirm final cleaning, curing or access restrictions, and protection of the new floor during the remaining remodel.
- Future matching: Ask whether spare material is included, where it will be stored, and what happens if the material is discontinued.
Do not compare an allowance for flooring with a fully installed price and assume they represent the same work. Ask what is excluded, how concealed conditions are handled, and whether changes to the subfloor or layout require a written change order.
Color and reflectivity also affect how the finished room feels under task, ambient, and accent lighting. Coordinate flooring samples with the lighting plan so a glossy surface does not create unwanted glare or a dark floor does not absorb more light than expected; the broader kitchen lighting plan should be reviewed alongside the material palette.
Installation, Licensing, and Permit Questions to Raise Early
Professional review matters most when the floor is uneven, the layout is changing, cabinets are being replaced, or the finished height affects appliances and doors. A good installation starts with a suitable substrate and a defined edge and transition strategy.
California’s State Licensing Board describes the C-15 Flooring and Floor Covering classification as covering surface preparation and installation of several flooring types, including resilient flooring and wood flooring, while excluding ceramic tile from that specific classification. The CSLB also describes residential remodeling work as potentially including flooring and tiling. Ask which licensed party holds responsibility for each part of the proposed scope: California flooring classification details and residential remodeling classification details.
The 2025 California Building Standards Code became effective January 1, 2026. Permit requirements still depend on the project and jurisdiction, so do not assume that a flooring change is always permit-free, particularly when the work involves structural changes, altered walls, relocated fixtures, demolition, or a broader kitchen remodel. The CSLB explains the general permit principle and the importance of local requirements in its California building permit requirements guidance.
Before work begins, ask who will evaluate the substrate, coordinate the floor with cabinetry, verify appliance clearances, manage inspections if applicable, and document changes discovered after demolition. These questions are more useful than asking only which flooring brand the installer prefers.
Cleaning, Repairs, and Replacement Planning
Maintenance and repairability should influence the choice before installation. Every floor can be damaged, but the type of damage and the practical repair method differ.
- Tile: A chipped or cracked tile may be removed and replaced individually if matching material is available. Cracked grout can sometimes be removed and renewed, but recurring cracks may indicate movement below.
- LVP: A damaged plank may be replaceable, depending on the locking or adhesive system and access to the affected area. Retain spare planks from the same purchase because colors and textures can change.
- Engineered or solid hardwood: Surface scratches may be repairable through touch-up or refinishing, depending on the finish and wear layer. Water damage can require board replacement and subfloor drying.
- Laminate: Surface damage is generally patched cosmetically or addressed by replacing boards. It is not normally refinished like solid hardwood.
- Natural stone: Cleaning, honing, polishing, and sealing depend on the specific stone and finish. A chip or crack may be repairable, but the result can remain visible.
- Cork: Local finish repair or replacement may be possible, but color changes and product availability can make a seamless match difficult.
Water intrusion changes the repair decision for every material. Replacing a visible plank or tile without investigating the moisture source can leave damaged adhesive, underlayment, subfloor, cabinetry, or insulation below the finished surface.
A Remodel-Ready Kitchen Flooring Checklist
Use this sequence before choosing a material or requesting an installation price:
- Measure the kitchen and note areas beneath islands, appliances, closets, and connecting rooms.
- Photograph every doorway, threshold, baseboard, cabinet toe-kick, and existing transition.
- Record whether cabinets and appliances will stay, move, or be replaced.
- List the hardest daily conditions: spills, pets, children, grit, rolling loads, standing time, and heavy traffic.
- Check for visible slopes, soft spots, cracked tile, squeaks, moisture marks, or movement.
- Collect large enough samples to judge color, texture, reflectivity, and scale in daylight and electric light.
- Place samples beside cabinet, countertop, backsplash, island, and adjacent-floor materials.
- Ask how the selected material affects finished height, appliance clearance, doors, baseboards, and transitions.
- Request a written scope that names demolition, disposal, substrate preparation, installation materials, labor, trim, transitions, appliance handling, cleanup, and spare material.
- Ask who handles permits or jurisdiction questions if the flooring is part of a wider remodel.
Frequently Asked Questions About Kitchen Flooring Materials
Is tile or LVP better for a kitchen with frequent spills and pets?
Tile is usually the stronger starting point when hard-surface durability and moisture tolerance are the top priorities. LVP may be the better fit when you value comfort, quieter use, wood-style appearance, and easier localized replacement. In either case, the joints, edges, transitions, and subfloor matter as much as the visible surface.
Can kitchen flooring be installed before cabinets?
Sometimes, but the correct sequence depends on the material, cabinet plan, appliance clearances, and installation system. Flooring should be planned before cabinetry is finalized so the finished height, cabinet perimeter, island, toe-kicks, and appliances work together. Your written scope should state whether the floor runs under cabinets, stops at them, or uses a separate edge detail.
Does waterproof kitchen flooring protect the subfloor from leaks?
No. A waterproof product claim generally describes the product or surface, not every seam, perimeter, transition, adhesive, cabinet connection, or subfloor condition. A leak must still be stopped, the affected layers dried and inspected, and damaged materials repaired or replaced.
What should a kitchen flooring installation estimate include?
It should identify measured material, waste, demolition, disposal, substrate preparation, underlayment or setting materials, installation labor, grout or adhesive, trim, transitions, appliance handling, cleanup, exclusions, allowances, change-order rules, and spare material. It should also explain how concealed subfloor problems and changes in the kitchen layout will be priced.
Choose the Floor as Part of the Whole Kitchen
The best kitchen flooring material is the one that fits your household, substrate, moisture exposure, adjacent rooms, maintenance habits, design, and construction sequence. A material decision made with those conditions in view is more reliable than choosing from a trend list or comparing material-only prices.
For a coordinated upgrade in Bell Gardens or elsewhere in Southern California, JR07 Development can discuss flooring alongside layout, cabinetry, countertops, backsplash, and finish work through its kitchen remodeling services.